Post Grades to TitanConnect

This video, created by Information Technology Services and the Registrar’s Office, walks you through the process of posting grades to TitanConnect. IDS is sharing their video here, as we often are contacted with questions about posting grades; however, if you have questions about posting grades, you should contact the Registrar’s Office (313-993-3313).


Add an Image

If you’d like to add an image into an item, discussion board post, announcement, or any other space where the toolbar is available, click the INSERT / EDIT IMAGE button on the bottom row of the toolbar. Browse your computer for the image file you’d like to add to the page. We recommend adding a brief description of the image in the IMAGE DESCRIPTION box. If the image is very large, you can edit the size in the add image box by clicking APPEARANCE, then changing the image’s width or height on the DIMENSIONS line (make sure the CONSTRAIN PROPORTIONS box is checked so your image doesn’t become warped). 500 is a decent width for a moderate sized image. 1000 works for a larger image (for reference, the animated image below is 1000 pixels wide). You can also resize the image after adding it to your item by holding the SHIFT key on your keyboard, then clicking and dragging the box on the side of your image (holding SHIFT constrains the proportions as you resize, again ensuring the image doesn’t become skewed).

add-image

Copy Content From One Course Site to Another

When teaching multiple sections of the same course, you may find that you’ve added a significant amount of content to one section that you’d also like added to the other. Fortunately, Blackboard makes it fairly easy to copy content from one course to another. If you’re looking to copy a whole menu item, you could use the COURSE COPY tool to copy your content. But if you’re looking to move a folder or item that’s inside a menu item, there’s still a way to copy easily.

First, click the options button to the right of the name of the thing you want to copy (note: some item types, like tests and assignments, cannot be copied in this way). If you choose MOVE, the item you wish to copy will be deleted from the current course as part of the process.

copyNext, choose the course you wish to copy the item to from the DESTINATION COURSE pulldown list.

destination courseOn the DESTINATION FOLDER line, click the BROWSE button.

browseSelect the menu item or folder you want to copy the content into from the browse menu.

select folderIf you have the option to select yes or no for “Create links for items that cannot be copied,” that means that one or more items inside your folder may not be copied as part of this process. This generally includes items like course links (a link to the discussion board, say), and tests or assignments. If you select YES, then a link will be created back to the course you copied from. We strongly recommend leaving this at NO, then re-creating this linked content inside the new course.

Once you’ve finished with your selections, click SUBMIT to initiate the copy. Depending on the amount of content you’re copying, it may take a few minutes for the process to complete.

copy-folder

Share large files with OneDrive

OneDrive, the cloud-based file storage solution available to the UDM community as part of Office 365, makes it easy to share files and large documents with others, including files that would traditionally be too large to send through email.

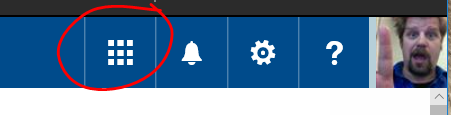
To share a file via OneDrive, first log into Office365 by your preferred means. Locate the button that looks like a grid of nine tiles in the bar that runs across the top of Office 365. Click that to open the Office 365 apps menu, then choose OneDrive.

Depending on the width of your window, it will either appear in the top left:

launchOr toward the right, just inside the notifications icon:

appsClick the UPLOAD button near the top of the page, then choose FILES. Select the file you wish to upload and click OPEN. It may take a few minutes for the file to appear, so be patient.

upload-fileCongratulations! Your file is uploaded … you’re halfway there. Now to share the file.

Locate the sharing column on the right-hand side of the page. Click where it says ONLY ME to open the sharing window.

On the left side of the sharing window, click INVITE PEOPLE, then enter the UDM email address of the person you wish to share the file with on the top line. By default, share allows the person you’re sharing with the edit the uploaded file — this can be useful if you’re co-authoring a document. If you’d prefer the person you’re sharing with can only view the file, select VIEW instead.

Enter a message if you’d like in the message box, then click SHARE. The person you’re sharing with will be emailed notification that you’ve shared the file.

Share


Page 9 of 30...7891011...2030...