Finding My Grades

Everyone always wants to know how well they performed on the test or the assignment they’ve just submitted. Once your professor has graded your work, you can check it in the My Grades section of the course.

To access My Grades, click on “Tools” in the left navigation menu,

mygrades1


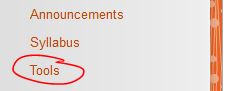
then find “My Grades”.

mygrades2

On the My Grades page, you will see a list of all the items either graded or upcoming.

mygrades3

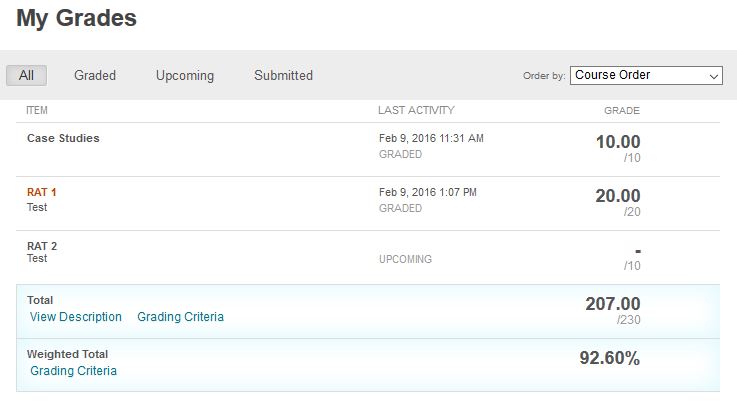
Items that are graded will have a score on the right side, and their last activity status listed in the middle column.
In the “Item” column, you will see the name of the items that are available to you.
In the image, notice that “Case Studies” & “RAT 1″ have been graded, but “RAT 2″ has not been graded yet.
Also notice “RAT 1″ is a colored hyperlink. This indicates you can click on the name of the item to view your attempt.
click on the name of the item,

mygrades4

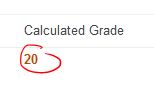
then click on the number in the “Calculated Grade” column to view your submission.

mygrades5

Copy a Test From One Course to Another

Having taken the time to create a test for one of your courses, you may want to copy that test into another course. There are a few ways to go about this. First, if you want to copy ALL the tests from one course into another, you can use the Course Copy function (outlined in greater detail here), but select only the Tests, Surveys, and Pools checkbox under the SELECT COURSE MATERIALS heading.

tests surveys pools checkboxIf you only want to move one test, the process is still pretty simple. Just open the test manager by clicking TESTS SURVEYS and POOLS under the COURSE TOOLS HEADING.

tests-surveys-pools-menuThen choose open the test manager by clicking TESTS.

tests-linkClick the OPTIONS button to the right of the name of the test you wish to copy to another course.

test-options-button

Then choose EXPORT. (Note, the COPY link here will duplicate the test within the current course, in case you want to keep a previous version of a test but make some changes for a new version.)

export-testDepending on your browser set up, a zip file containing the exported test may be automatically downloaded to your DOWNLOADS folder, or you may be prompted as to whether you would like to save or open the zip. If you are prompted, choose SAVE FILE, then save the zip to a location on your computer where you will be able to find it again easily.

save-exportNow open the course you want to add the test to, and navigate to the test manager. This time, click the IMPORT TEST button at the top of the page.

import-testOn the TEST IMPORT page, click BROWSE MY COMPUTER.import-test-browseLocate the zip file you just downloaded on your computer, select it and click OPEN. Check out this walkthrough if you’re using Safari on a Mac and you’re finding a folder instead of a zip file.

select-saveThen click SUBMIT to finish the copy process.


Did You Create Your Test From Pools?

Good news! Any pools associated with your test will be copied and imported as a part of the import process.


Creating a Folder on Blackboard (And Putting Things Inside It)

Just like on your desktop (or laptop or even in your filing cabinet), Blackboard folders are the best way to organize content and keep similar items together. Fortunately, folders are dead-simple to create and populate. To create a folder, navigate to the part of the course where you want to create your new folder, then point to BUILD and choose CONTENT FOLDER.

build-folderEnter a name for your folder in the NAME space. You can also use the color picker to change the color of the link students will click to open the folder. If you’re not sure about how to use the color picker, check out this brief walkthrough.

folder-nameIf possible, enter a brief description of what students can expect to find when they open the folder. It doesn’t take long to provide a bit of descriptive information, and even just a couple of lines can go a long way toward helping students find what they’re looking for more quickly.

folder-descriptionThe options for a folder are the same STANDARD OPTIONS you find on nearly every other item in Blackboard. If you need help setting the options, check out this brief overview.

When you’ve got your options set, click SUBMIT to create your folder.

folder

To add things to your folder, just click the folder name to open it, then start adding as you normally would.


Standard Options

The Standard Options are the same on pretty much everything you add to Blackboard.

If you’d like to make the content available to students, whether immediately or at a later date, click select YES on the “Permit Users to View this Content” line.

If you’d like users to view the content at a set time in the future, but not immediately, you should select YES on the “Permit Users to View” line, then check the DISPLAY AFTER box and enter the date and time you want students to have access.

You can limit access to a window of time by also checking the DISPLAY UNTIL box and entering a date and time (note, you can make content available from a set time in the future until a set time in the future by setting both AFTER and UNTIL restrictions; you can make content available from the moment you add it until a set date by setting only an UNTIL restriction.

If you’d like to be able to see view statistics for this content (as well as other content items on the page you’re adding it to), select YES on the “Track Number of Views” line.


standard-options

Once you’ve set the options as you’d like them, click SUBMIT to add the content or save your changes.

Test Availability Exceptions

In the past, some faculty have used the password option to make a test available to individuals after the official test-taking period has ended, or, in course sites that include both graduate and undergraduate students, to make sure only the grad students launch the grad exam and only undergrads take the undergrad exam. The Test Availability Exceptions feature makes it easier to manage this sort of situation. Even better, Availability Exceptions make it possible to extend the time limit on an exam to individual students with disabilities.

To set an availability exception, first click the ADD USER OR GROUP button.

add-groupIf you’re looking for a specific user or group, use the search box to track them down. You can also browse the whole list of students and groups by leaving the search box set to ANY and NOT BLANK.

search-not-blankAdd use the check boxes on the left of the name of the user or group you wish to add an exception for, then click SUBMIT at the bottom of the pop-up window.users-groupsEnter the options for the exception, including number of attempts, timer, and date range of availability. Remember, if the you’ve selected NO under MAKE THE LINK AVAILABLE, then the availability exceptions will be ignored here as well. If you’d like to remove an availability exception, click the X on the right of the exception.

exception-options

Page 10 of 30...89101112...2030...