Author Archives: Russell Davidson

Copy Content From One Course Site to Another

When teaching multiple sections of the same course, you may find that you’ve added a significant amount of content to one section that you’d also like added to the other. Fortunately, Blackboard makes it fairly easy to copy content from one course to another. If you’re looking to copy a whole menu item, you could use the COURSE COPY tool to copy your content. But if you’re looking to move a folder or item that’s inside a menu item, there’s still a way to copy easily.

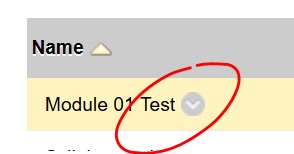
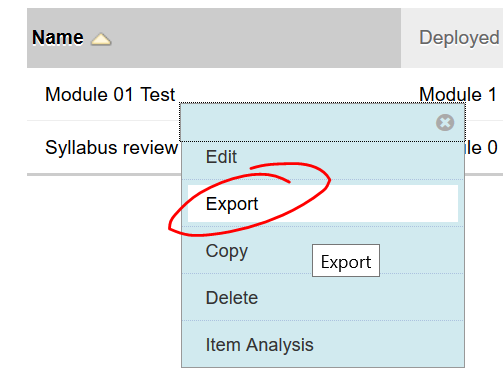
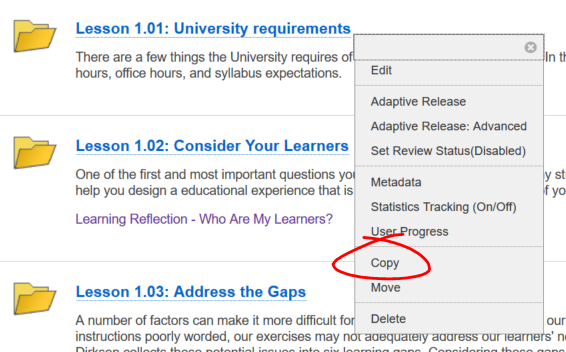
First, click the options button to the right of the name of the thing you want to copy (note: some item types, like tests and assignments, cannot be copied in this way). If you choose MOVE, the item you wish to copy will be deleted from the current course as part of the process.

copyNext, choose the course you wish to copy the item to from the DESTINATION COURSE pulldown list.

destination course
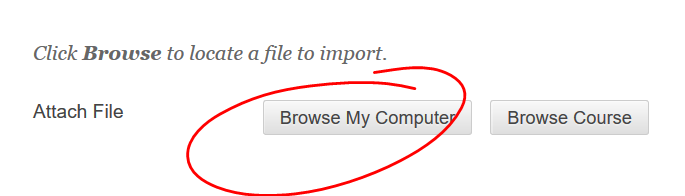
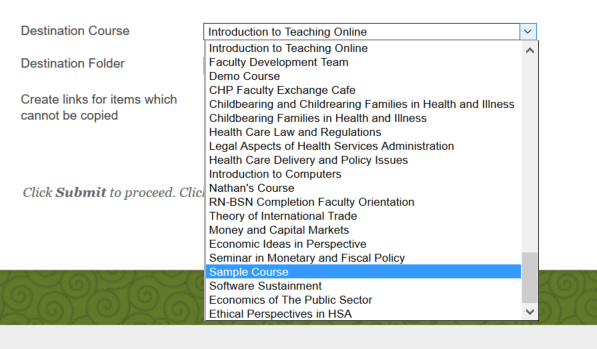
On the DESTINATION FOLDER line, click the BROWSE button.

browse
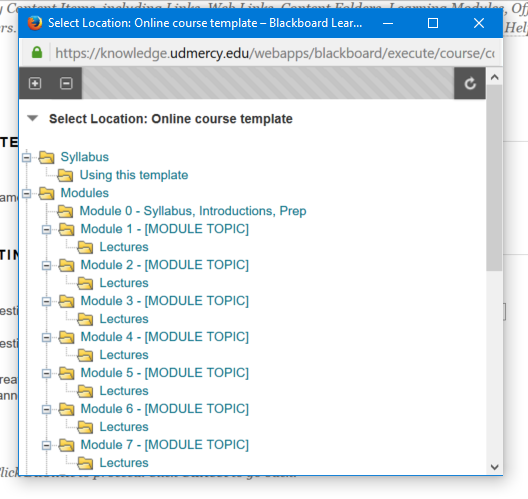
Select the menu item or folder you want to copy the content into from the browse menu.

select folderIf you have the option to select yes or no for “Create links for items that cannot be copied,” that means that one or more items inside your folder may not be copied as part of this process. This generally includes items like course links (a link to the discussion board, say), and tests or assignments. If you select YES, then a link will be created back to the course you copied from. We strongly recommend leaving this at NO, then re-creating this linked content inside the new course.

Once you’ve finished with your selections, click SUBMIT to initiate the copy. Depending on the amount of content you’re copying, it may take a few minutes for the process to complete.

copy-folder

Share large files with OneDrive

OneDrive, the cloud-based file storage solution available to the UDM community as part of Office 365, makes it easy to share files and large documents with others, including files that would traditionally be too large to send through email.

To share a file via OneDrive, first log into Office365 by your preferred means. Locate the button that looks like a grid of nine tiles in the bar that runs across the top of Office 365. Click that to open the Office 365 apps menu, then choose OneDrive.

Depending on the width of your window, it will either appear in the top left:

launchOr toward the right, just inside the notifications icon:

appsClick the UPLOAD button near the top of the page, then choose FILES. Select the file you wish to upload and click OPEN. It may take a few minutes for the file to appear, so be patient.

upload-fileCongratulations! Your file is uploaded … you’re halfway there. Now to share the file.

Locate the sharing column on the right-hand side of the page. Click where it says ONLY ME to open the sharing window.

On the left side of the sharing window, click INVITE PEOPLE, then enter the UDM email address of the person you wish to share the file with on the top line. By default, share allows the person you’re sharing with the edit the uploaded file — this can be useful if you’re co-authoring a document. If you’d prefer the person you’re sharing with can only view the file, select VIEW instead.

Enter a message if you’d like in the message box, then click SHARE. The person you’re sharing with will be emailed notification that you’ve shared the file.

Share


Copy a Test From One Course to Another

Having taken the time to create a test for one of your courses, you may want to copy that test into another course. There are a few ways to go about this. First, if you want to copy ALL the tests from one course into another, you can use the Course Copy function (outlined in greater detail here), but select only the Tests, Surveys, and Pools checkbox under the SELECT COURSE MATERIALS heading.

tests surveys pools checkboxIf you only want to move one test, the process is still pretty simple. Just open the test manager by clicking TESTS SURVEYS and POOLS under the COURSE TOOLS HEADING.

tests-surveys-pools-menuThen choose open the test manager by clicking TESTS.

tests-linkClick the OPTIONS button to the right of the name of the test you wish to copy to another course.

test-options-button

Then choose EXPORT. (Note, the COPY link here will duplicate the test within the current course, in case you want to keep a previous version of a test but make some changes for a new version.)

export-testDepending on your browser set up, a zip file containing the exported test may be automatically downloaded to your DOWNLOADS folder, or you may be prompted as to whether you would like to save or open the zip. If you are prompted, choose SAVE FILE, then save the zip to a location on your computer where you will be able to find it again easily.

save-exportNow open the course you want to add the test to, and navigate to the test manager. This time, click the IMPORT TEST button at the top of the page.

import-testOn the TEST IMPORT page, click BROWSE MY COMPUTER.import-test-browseLocate the zip file you just downloaded on your computer, select it and click OPEN. Check out this walkthrough if you’re using Safari on a Mac and you’re finding a folder instead of a zip file.

select-saveThen click SUBMIT to finish the copy process.


Did You Create Your Test From Pools?

Good news! Any pools associated with your test will be copied and imported as a part of the import process.


Creating a Folder on Blackboard (And Putting Things Inside It)

Just like on your desktop (or laptop or even in your filing cabinet), Blackboard folders are the best way to organize content and keep similar items together. Fortunately, folders are dead-simple to create and populate. To create a folder, navigate to the part of the course where you want to create your new folder, then point to BUILD and choose CONTENT FOLDER.

build-folderEnter a name for your folder in the NAME space. You can also use the color picker to change the color of the link students will click to open the folder. If you’re not sure about how to use the color picker, check out this brief walkthrough.

folder-nameIf possible, enter a brief description of what students can expect to find when they open the folder. It doesn’t take long to provide a bit of descriptive information, and even just a couple of lines can go a long way toward helping students find what they’re looking for more quickly.

folder-descriptionThe options for a folder are the same STANDARD OPTIONS you find on nearly every other item in Blackboard. If you need help setting the options, check out this brief overview.

When you’ve got your options set, click SUBMIT to create your folder.

folder

To add things to your folder, just click the folder name to open it, then start adding as you normally would.


Standard Options

The Standard Options are the same on pretty much everything you add to Blackboard.

If you’d like to make the content available to students, whether immediately or at a later date, click select YES on the “Permit Users to View this Content” line.

If you’d like users to view the content at a set time in the future, but not immediately, you should select YES on the “Permit Users to View” line, then check the DISPLAY AFTER box and enter the date and time you want students to have access.

You can limit access to a window of time by also checking the DISPLAY UNTIL box and entering a date and time (note, you can make content available from a set time in the future until a set time in the future by setting both AFTER and UNTIL restrictions; you can make content available from the moment you add it until a set date by setting only an UNTIL restriction.

If you’d like to be able to see view statistics for this content (as well as other content items on the page you’re adding it to), select YES on the “Track Number of Views” line.


standard-options

Once you’ve set the options as you’d like them, click SUBMIT to add the content or save your changes.

Page 5 of 19...34567...10...