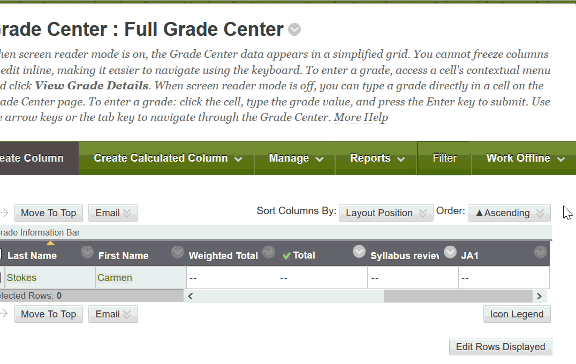
Hide a Grade Center column from Instructor view
Hiding a column from Instructor View can make your Grade Center page easier to manage. Some faculty hide columns they’ve finished grading (such as old attendance columns), or columns they’re not ready to deal with yet (future attendance columns).
Columns that are hidden from Instructor view are still visible to students (unless they’re hidden from student view before they’re hidden from Instructor View).
More importantly, columns that are hidden from instructor view are still included in gradebook score calculations. This means if you hide a column that is included in the total grade, or weighted total grade, it will still be factored in, regardless of whether you can see it or not.
If you’re cleaning up your grade center, we recommend deleting columns rather than hiding them, to reduce any potential confusion on the part of your students, as well as any possible side-effects on scoring.
The process for hiding a Grade Center column from Instructor view is simple. Click the options button to the right of the column you wish to hide, then choose “Hide from Instructor View”.
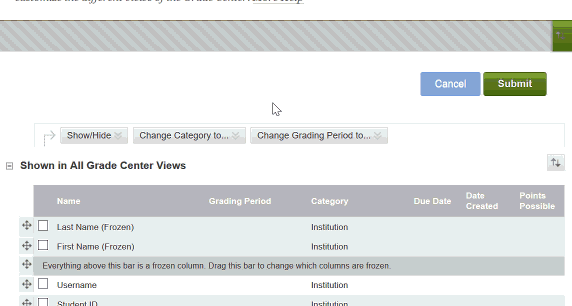
 Restoring a hidden column to Instructor view is a little more complicated. You’ll need to point to the MANAGE button at the top of Grade Center, then choose COLUMN ORGANIZATION to find the column you wish to restore.
 Scroll down the page until you locate the column you wish to restore. Check the box to the left of the column name(s). Then point to the Show / Hide button at the top or bottom of the page. Choose SHOW SELECTED COLUMNS. Finally, most importantly, click SUBMIT at the top or bottom of the page to save your changes.
 To learn more about showing and hiding columns and groups of columns from instructor view, check out our tutorials on Grading Periods and Smart Views.