Link to an interactive tool from a content area
Are you having your students engage in online discussion, write blog or journal posts, collaborate using a wiki, or work in groups? If you’re organizing your course by topic rather than content type (that is, putting all the content and activities for a unit / lesson / module / week together in a single folder), you’ll links directly to these activities inside your content area.
Once you’re familiar with the process, linking directly to these tools is easy. But the first couple times you go through the process it may be a little confusing.
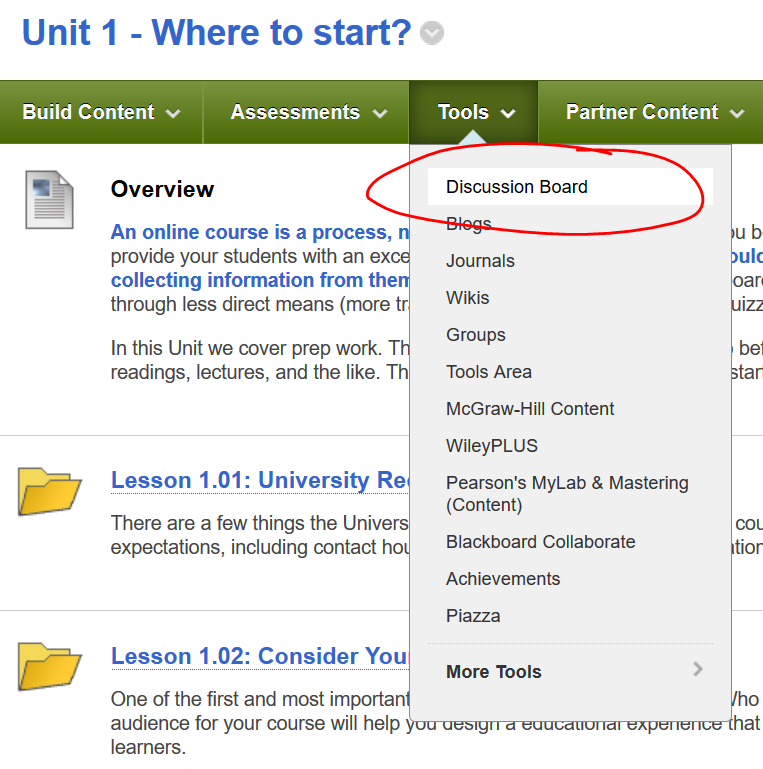
First, in the content area you’d like to add the link to (Unit 01, say), point to TOOLS, and select the tool you’d like to link to. We’ll use the Discussion tool for this example, but process is the same for any of the above tools.
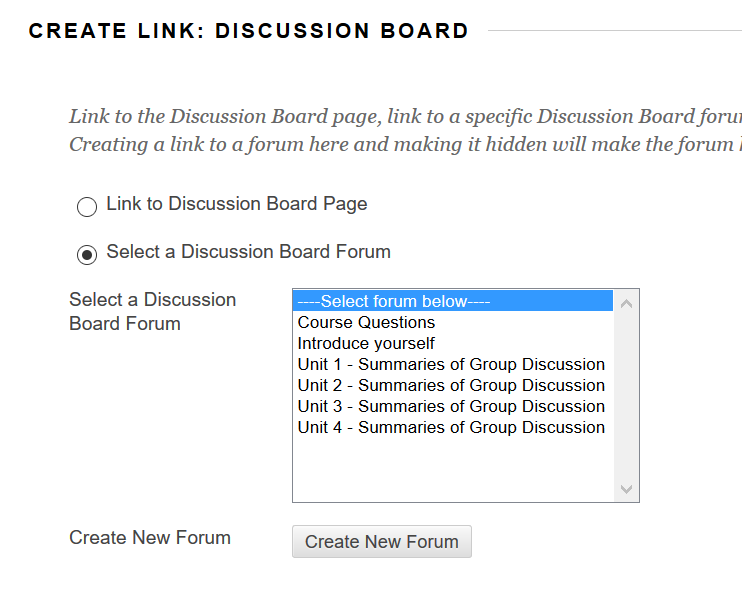
Next you’ll be prompted to select where you’d like the link to point. Do you want to point to the tool’s main page — e.g., the main Discussion Board page from which any of the discussion board forums can be selected? Often, it would be better to link the students to the particular item on that page you want them to post to (sticking with the discussion example, a particular discussion forum). If you’ve already created the form, choose the second option (Select a Discussion Board Forum) and choose the appropriate item. Haven’t created the item (discussion forum) yet? Click the CREATE NEW button.
If you went the CREATE NEW route, your next step will be to create that new item. So if you decided to add a new discussion forum, you’ll be creating the discussion forum — name, instructions / description, availability, etc.
When you click SUBMIT on this on this page, you’ll be bounced back to the CREATE LINK page above, this time with your new new item in the select list. Select the item and click NEXT to finish the process.
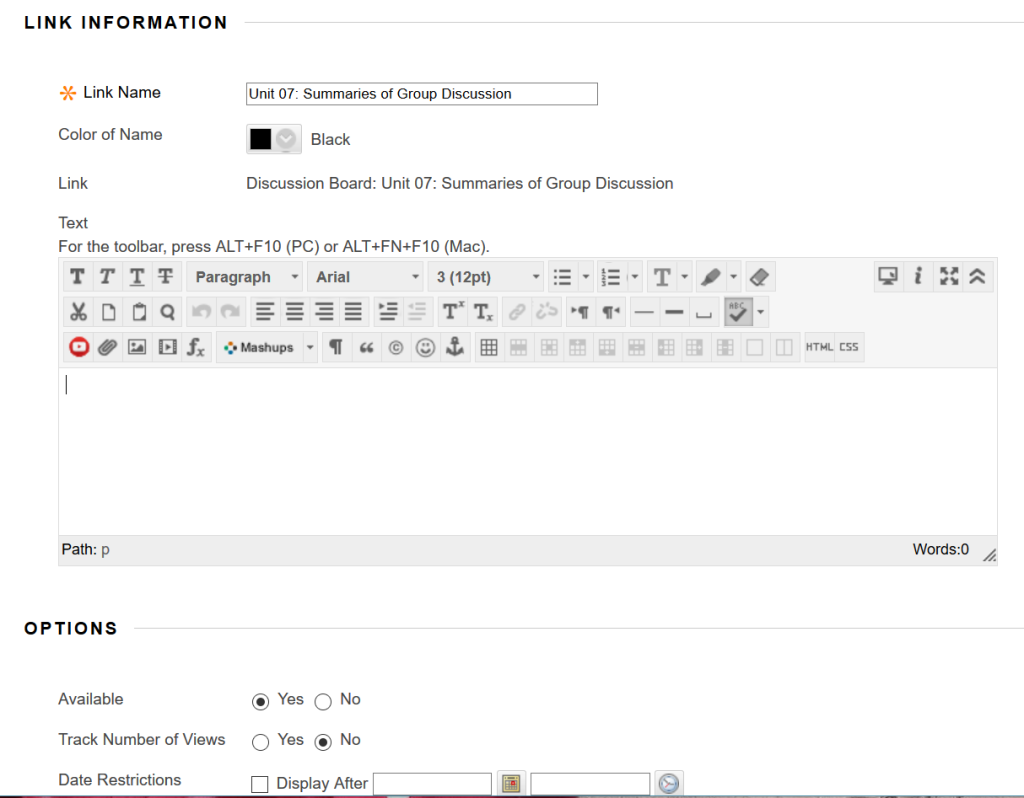
The final step of the CREATE LINK process is a page that probably pretty familiar to you by now. The name of the thing you’re linking to will be pulled in automatically, but you can change that if necessary. Then, in the text space, provide your students with instructions on how they should use the tool you’re linking to. Remember that, even if you’ve included instructions on the instance — when you created the discussion board forum, say — your students will be bypassing that page, so you’ll want to reproduce those instructions here.
Similarly, when you put availability dates on this link, you’re setting the availability for the link. If you haven’t set availability dates on the item itself (e.g., the discussion forum), then students will still be able to access the item through the course TOOLS page. If you need to adjust availability dates (make the access window longer for a discussion board forum), you’ll want to adjust the dates on the link and on the item itself (again, via the TOOLS page).
Once you’ve got the link’s settings the way you want them, click SUBMIT to add your link to the page.
Shortlink for this post: http://ids.commons.udmercy.edu/?p=1684

