Creating an Assignment
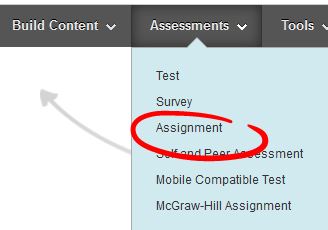
In this tutorial, we will walk through the process of creating an assignment in your Blackboard course. To start, first go into a content area where you wish to make an assignment available to your students. Mouse over the “Assessments” button toward the top of the body of the page and select “Assignment”.
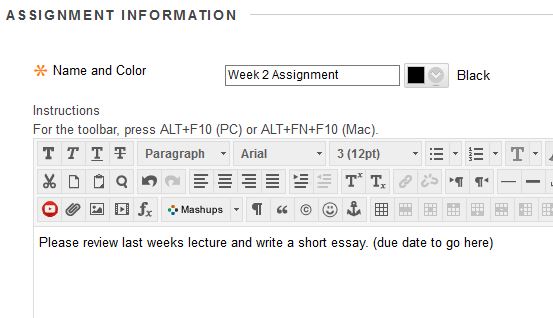
Next, type in the assignment name along with any instructions you may have for your students. Adding a due date into the set of instructions helps to eliminate any confusion as to when an assignment is due since it’s part of the instructions, but of course is up to you.
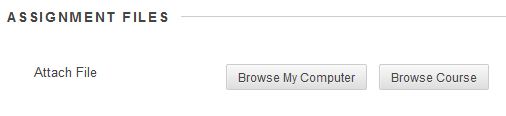
If you have any files to attach for your students to review or work off of, you may add them by clicking on the “Browse My Computer” button. Or if’ you’ve already uploaded it to your course, click “Browse Course”
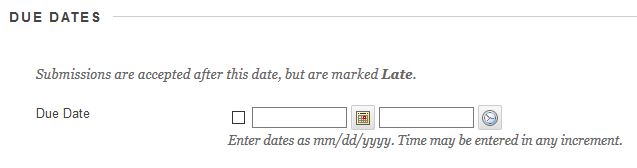
Next you have the option to add a due date.
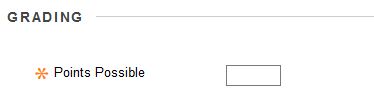
Make sure to put in a point value for this assignment. This is a mandatory field.
If you are using a rubric to grade your assignment, you may add it by clicking on the “Add Rubric” button. If you would like to learn how to utilize Rubrics in Blackboard, please check out this tutorial on Rubrics in Blackboard.
![]()
From here, there’s additional options in the next 3 categories. You can view what’s in each category by clicking the title to expand the options. Generally speaking, the default settings are usually set appropriately, but you may wish to change some of them depending on your needs.
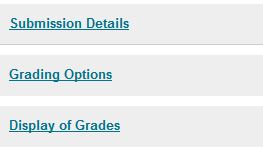
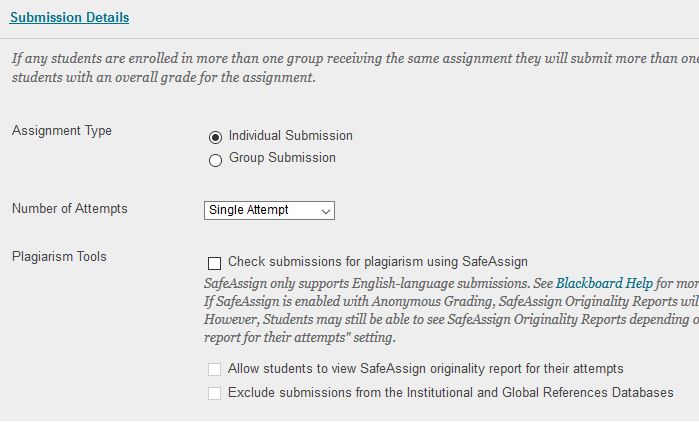
Under Submission Details, you can leave the default assignment type as individual submission, or change the assignment to a group submission, and also allow more than one attempt. NOTE: Allowing multiple submissions adds additional attempts in the grade center that will need your attention. More on the Plagiarism checker here.
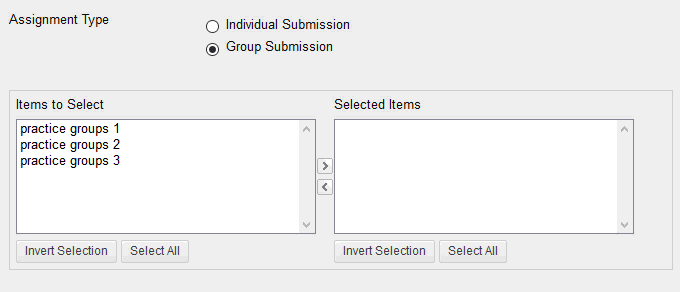
Group Submission
When selecting the Group Submission option, you will have a choice to select the group(s) to assign the assignment to. NOTE: You will need to have groups already created in the course before you can use this feature.
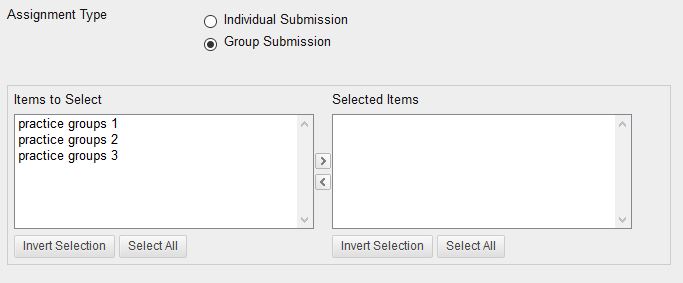
Next, click the group(s), then click the top arrow to move your selection over to the “Selected Items” section.
Under Grading Options, you can turn on anonymous grading if you wish. You may also set the assignment to allow peer to peer grading by checking the “Enable Delegated Grading” option. 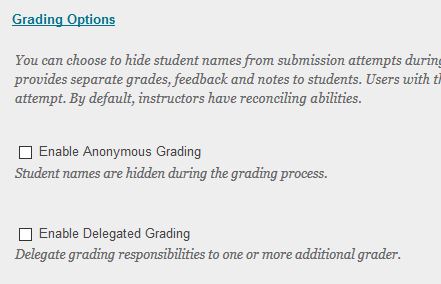
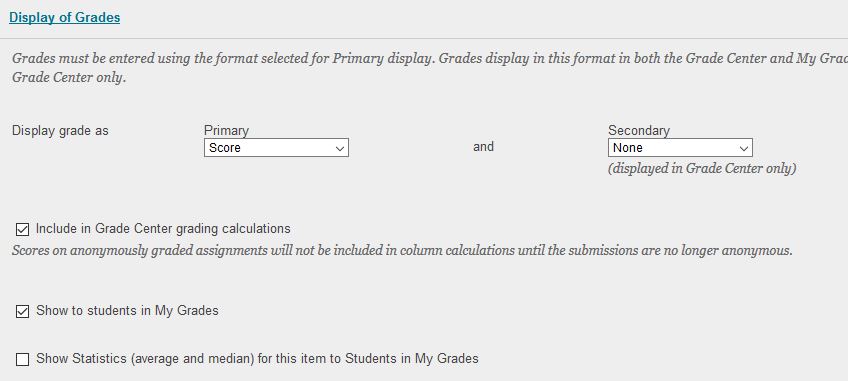
Under Display of Grades, you can change the primary and secondary score (this can also be done in the Grade Center) from the default. You may also decide this assignment is a practice, so you may wish to uncheck the “Include in grade center grading calculations” option. Generally speaking, it’s a good idea to leave it checked as the default. You may also make the score unavailable to your students by unchecking the “show to students in my grades”. If you wish to show the statistics for the assignment to your students, check the third option.
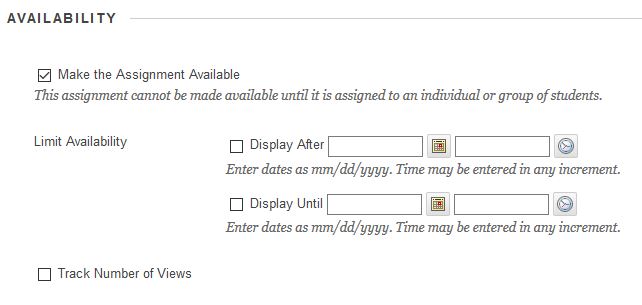
 You may wish to limit when your students have access to the assignment. Maybe you are setting up your class for future weeks, or wish to grant them access for a specific time frame for that week. You may do so by selecting a date and time range, just click on the calendar and/or clock icon to set the date and time. Make sure there’s a check in the appropriate display after / display until field(s) if you wish to limit the availability. If you leave it blank, the assignment will be open until you turn it off manually. You may also track the number of views for this assignment by checking the track number of views option.
 When your finished, click the submit button.
![]()
Shortlink for this post: http://ids.commons.udmercy.edu/?p=1682

