Foldering multiple presentations in Blackboard Collaborate
If you’ve ever run a class in Blackboard Collaborate and tried using more than one PowerPoint presentation — maybe your students are giving online presentations and each presenter has their own set of slides — you’ve noticed Collaborate doesn’t manage multiple presentation files very well on its own. Fortunately, we can easily solve this problem by manually foldering our presentations. In Blackboard Collaborate lingo, we need to create “Whiteboard page groups.”
First, we need to open the Page Explorer. The easiest way to open the Page Explorer is by clicking the menu button on the Whiteboard navigator (in the upper right of your whiteboard screen), and selecting SHOW PAGE EXPLORER.

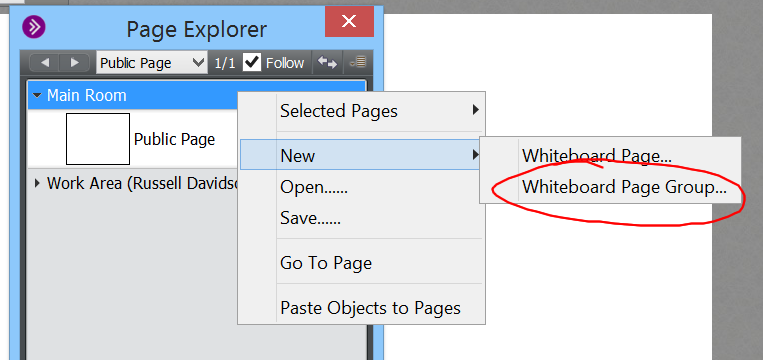
Now we need to create a new Whiteboard Page Group. RIGHT CLICK on MAIN ROOM in the Page Explorer, point to NEW, then select Whiteboard Page Group.
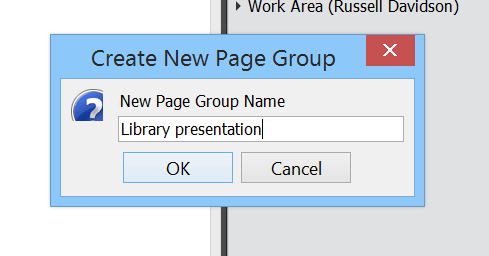
Next, name your group and click OK.
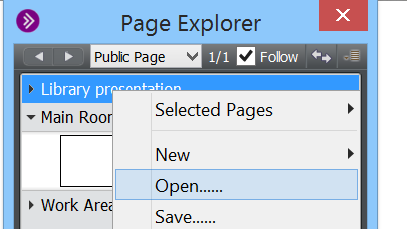
This adds our named group to the Page Explorer. To add a set of slides to this group, right click on your new group and select OPEN.
Then locate and open the PowerPoint file on your computer. Depending on the size of your presentation, it may take a few minutes for the PowerPoint file to upload into your Whiteboard Group. Once the upload is complete, you should see previews of all the slides in your Page Explorer.
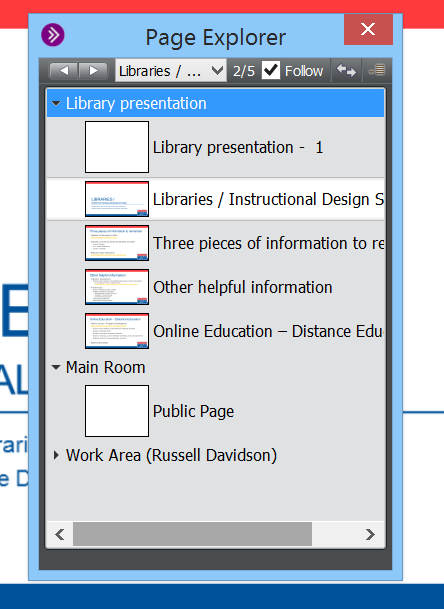
Double-click a slide to push it out to the whiteboard. You move a slide up or down in the list by clicking and dragging it. You can remove a slide by right-clicking the slide, then pointing to SELECTED and choosing DELETE. You can also collapse or expand a set of slides by clicking the group name.
Shortlink for this post: http://ids.commons.udmercy.edu/?p=1170

